Setup
Getting started with ProxMobo is simple. Follow these steps to connect ProxMobo to your Proxmox VE (Virtual Environment) instance, allowing you to monitor and manage your virtual machines (VMs) and containers directly from your iOS device.
Launch ProxMobo
Open the ProxMobo app on your iOS device. If this is your first time using the app, you'll be greeted with a welcome screen. Tap on the “Add Proxmox VE Server” button to initiate the setup process.
Add Proxmox VE Server
You will be presented with a form to enter your server details:
- Display Name: Assign a recognizable name for your Proxmox VE server which will appear in ProxMobo.
- Schema: Select the connection protocol. Proxmox VE defaults to using HTTPS for secure connections.
- Host: Provide the IP address or domain name of your Proxmox VE instance. Omit the scheme (such as
httpsorhttp) and the port number (8006) in this field. - Port: Specify the port number for the connection. Proxmox VE typically operates on TCP port 8006. If you're using a public domain name set up through a service like Cloudflare Tunnel, you may be using port 443.
- Username: Your Proxmox VE username.
- Password: The password associated with your Proxmox VE username.
- Realm: Select the authentication realm you're using with Proxmox VE, commonly set to Linux PAM standard authentication.
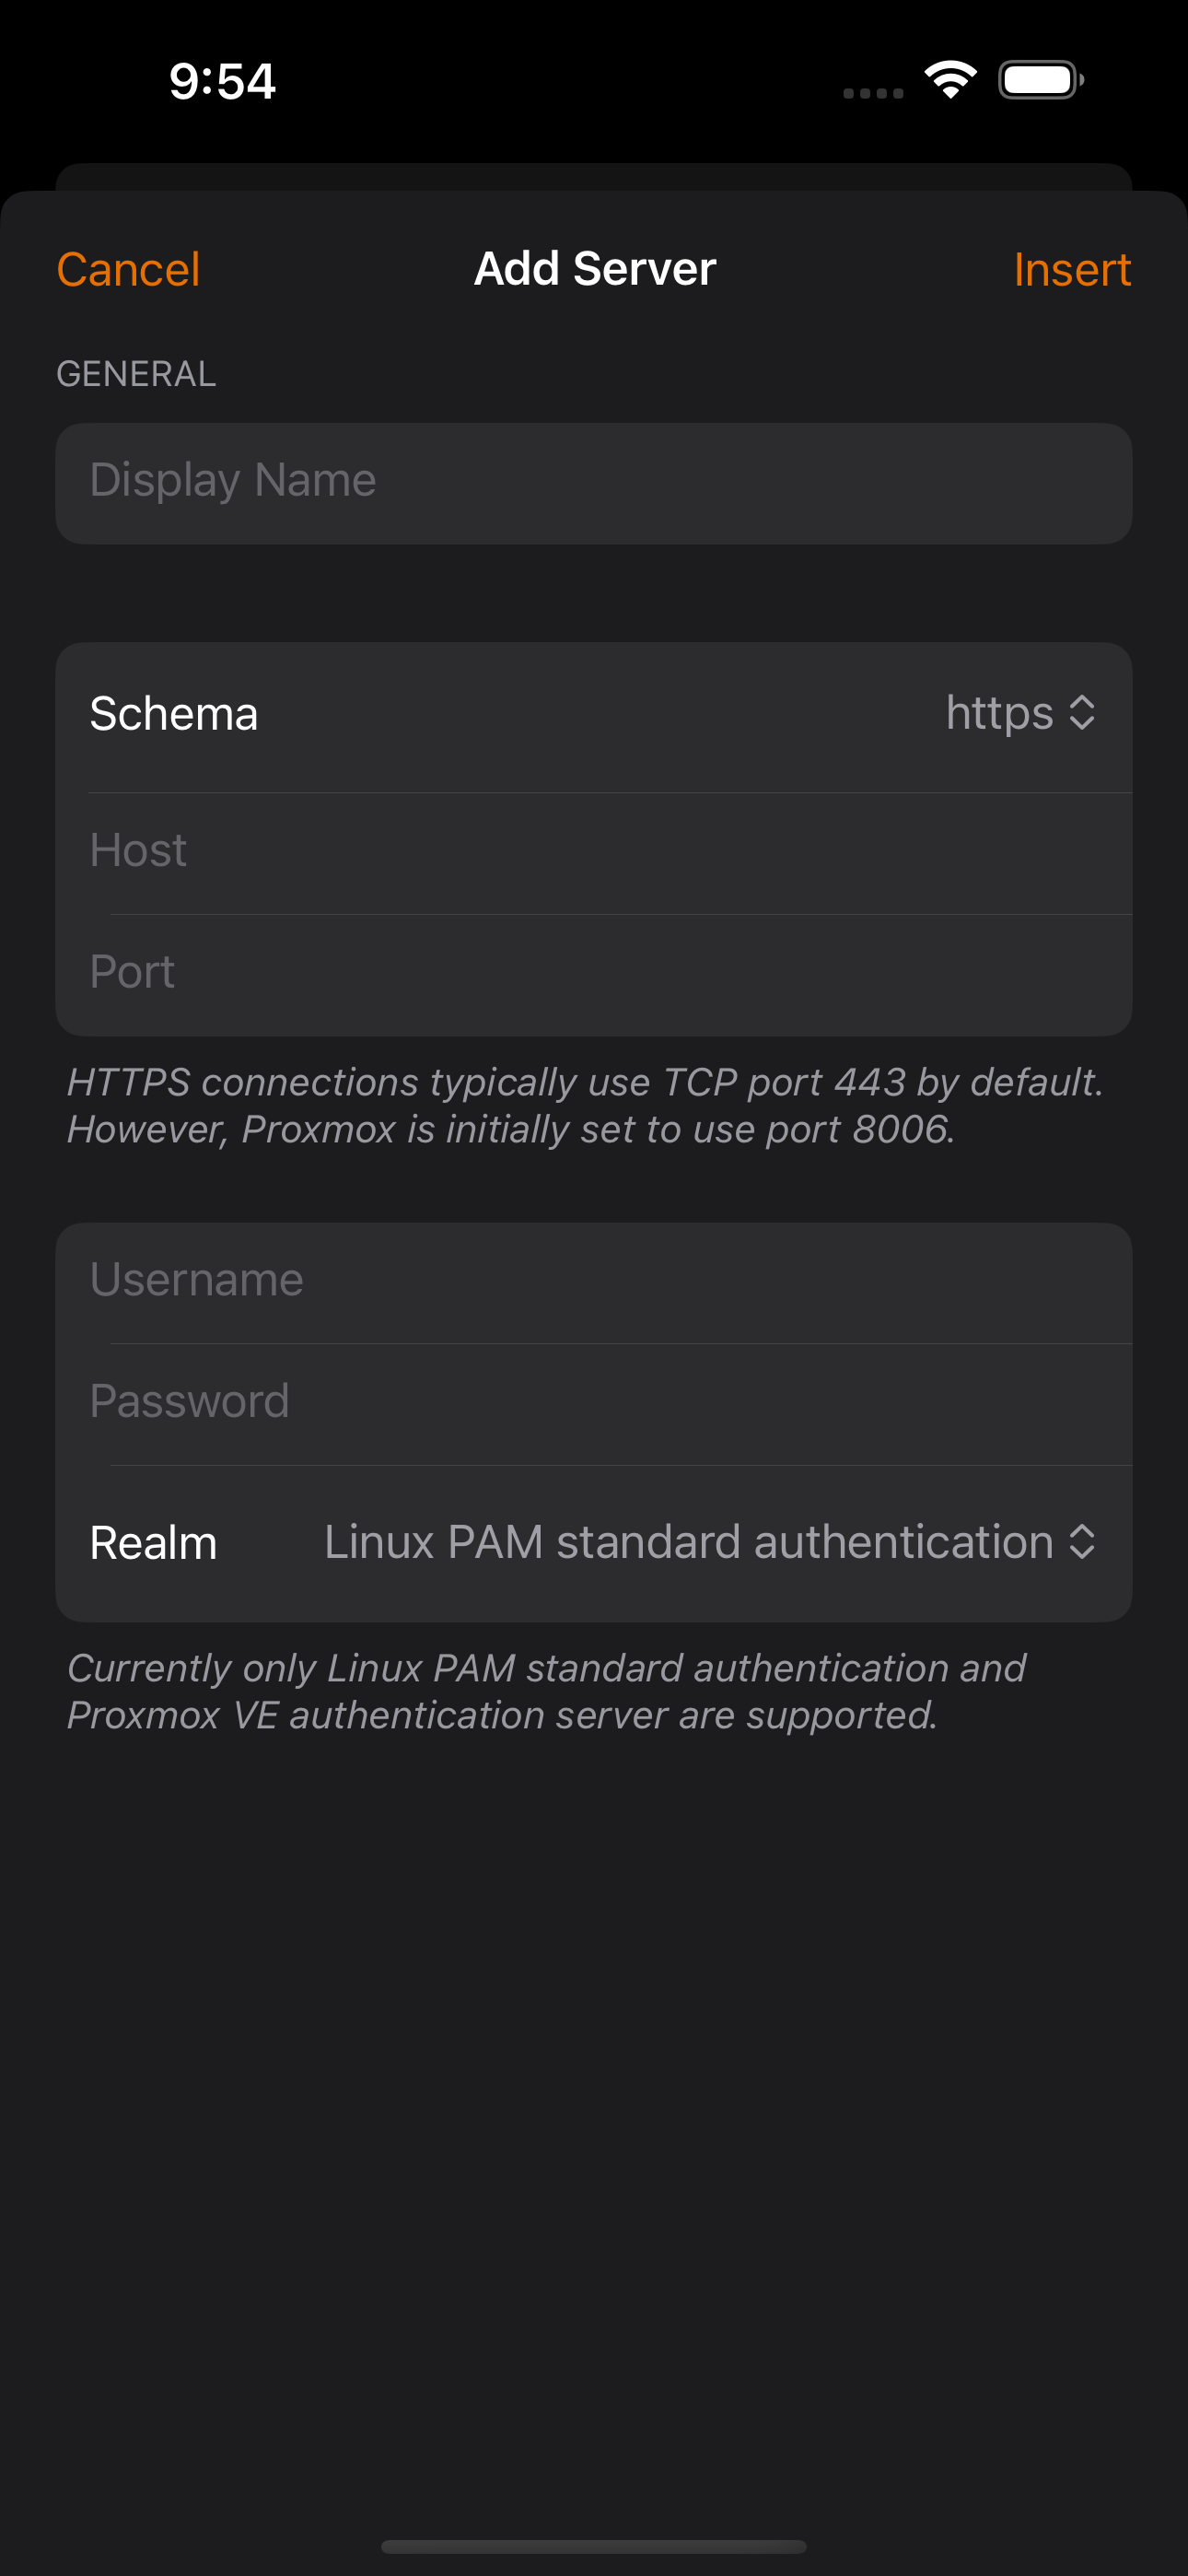
After filling in all the details, tap on the “Insert” button to add the server to ProxMobo. The app will attempt to connect to the specified Proxmox VE instance.
Verification and Access
Once connected, you should be able to see an overview of your Proxmox VE environment. You can now start monitoring and managing your VMs and containers.
If you encounter any issues during the setup process, ensure that your iOS device is connected to the network and that all server details have been entered correctly.